

Article
Install Gluesync on Windows and Linux: the lean path to the Control Plane
The new Windows and Linux install guides are thorough on purpose. This article is the lean version: wizard on Windows Server, one command then a guided screen on Linux, same Control Plane at the end.
Installation guides that cover every edge case are a gift. Until you just need the happy path before lunch, and the page still wants another forty minutes of your afternoon.
The Gluesync docs now carry two full how-to guides for a clean install: one for Windows Server, one for Linux. Both are thorough on purpose. This article is the lean version. Same facts, fewer detours, and a straight link back to each guide when you want the whole walkthrough.
What you are installing is the self-managed kit: the installer checks the host, prepares the container runtime where it can, downloads the licensed services and starts the Control Plane. You do not write a Compose file first. You do not pre-install Docker on the default online path. You need a kit ID from the download email (12 characters, 0-9 and a-f), free ports 80 and 443, and a dedicated host that can reach the endpoints listed in the system requirements.
Two paths. Same destination.
Windows Server: a guided wizard
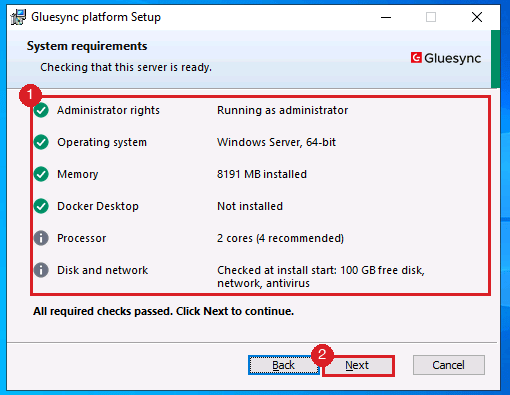
On Windows Server the default is the setup wizard, gluesync-windows-setup-wizard.msi. Sign in as a local administrator, run the MSI as administrator and click through Welcome, the licence, the install folder and the system requirements page. The wizard shows one row per check. When every required check passes, Next stays enabled.
Choose Download from MOLO17 for an online install, type your kit ID, then Install. Windows will ask for a restart so it can turn on the Containers feature. Restart promptly: after boot, setup continues by itself as SYSTEM, usually within about a minute, with nobody signed in. It installs the Docker engine and the platform images.
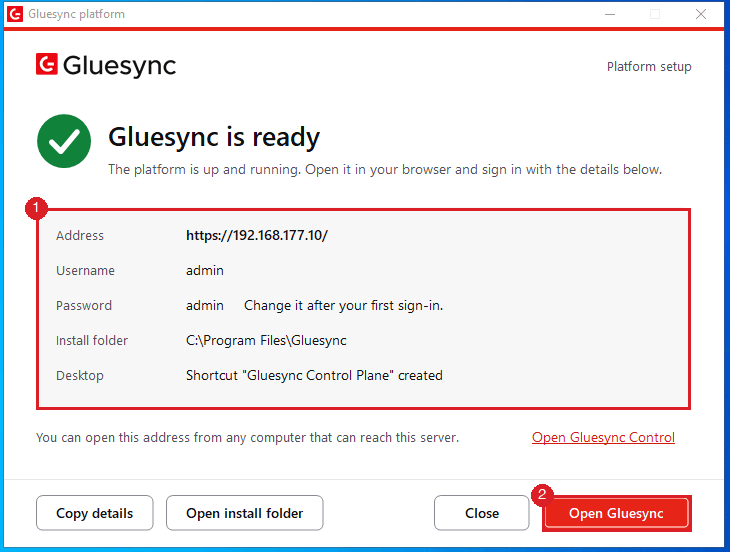
When you next sign in, keep the Gluesync launch window open. It walks four stages: Checking Docker, Downloading platform images, Starting Gluesync services, Checking the services are running. When it says Gluesync is ready, you get the Control Plane address, the first admin sign-in and the install folder. In the lab that path took about ten minutes from Install to ready, including the restart.
Two notes that save a support ticket. Agree antivirus and EDR exclusions with your security team before you install: Gluesync runs in Windows containers, and scanners that hold Docker’s files open can stop the image pull or keep containers restarting. And if Group Policy blocks PowerShell scripts, stay on the setup wizard: it runs no PowerShell or VBScript at install time. Server Core and scripted installs use the separate PowerShell installer instead.
Full walkthrough, pre-flight checker, exclusions table and offline options: Install and run Gluesync on Windows Server. Wizard reference: Windows setup wizard.
Linux: one command, then a terminal screen
On Linux the entry point is one command from an account that can use sudo:
curl -fsSL https://molo17.com/gs-content/utils/docker-installer.sh | sudo env GLUESYNC_TELEMETRY=0 bash
That script only downloads Gluesync Control for the CPU of the server (amd64 or arm64), checks size and SHA-256 against the MOLO17 catalog, and runs gluesync install. The guided screen then does the rest: Welcome, licence, Online or Offline source, kit ID, Checks, Docker, Ready to install, Done.
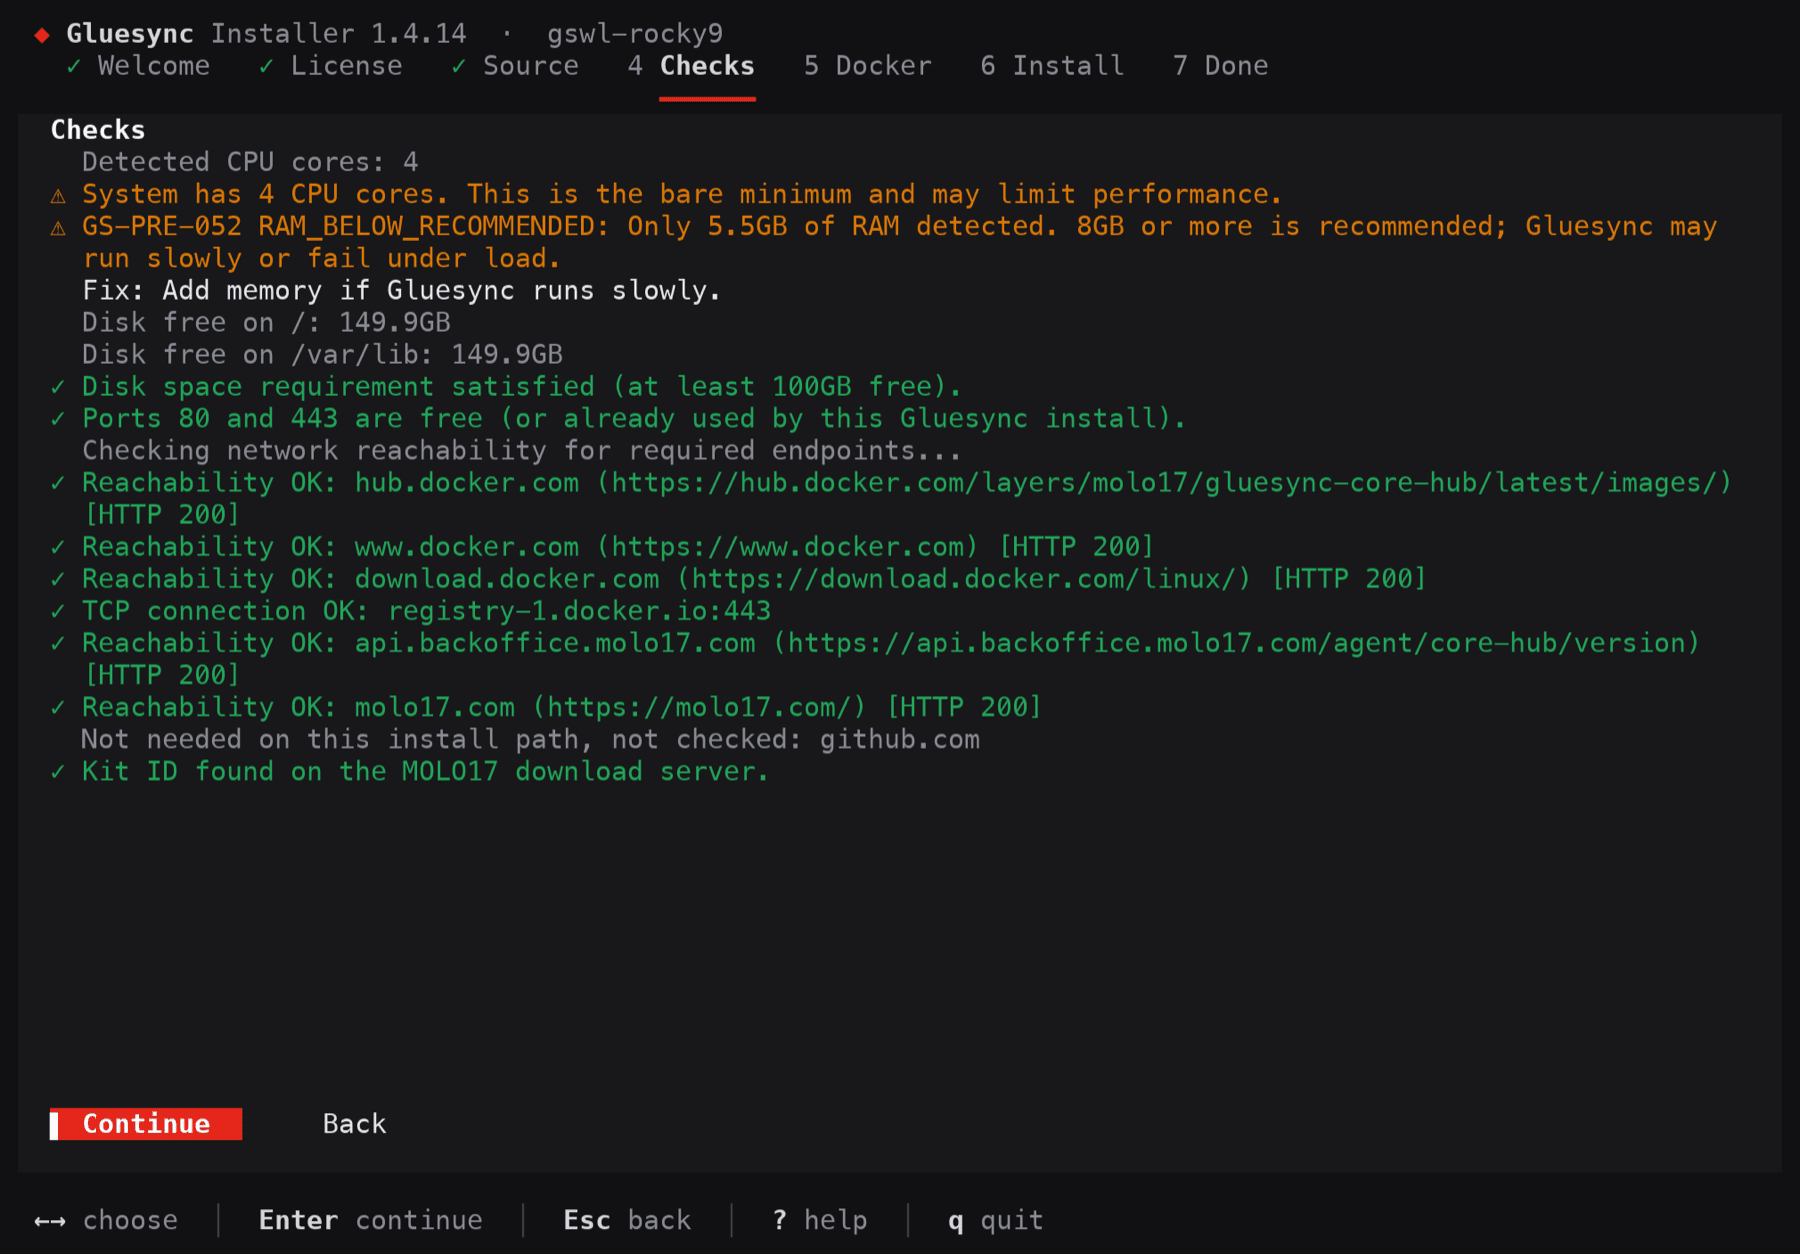
Warnings (for example exactly four CPU cores, or memory below the documented 8 GB recommendation) do not stop the install. Hard blocks do: fewer than four cores, under 100 GB free disk, and similar codes listed in the guide. Online, the installer installs Docker Engine from your distribution’s repository, copies the kit to /opt/gluesync and starts seven containers. In the lab that took a little over three minutes on a server with no Docker yet.
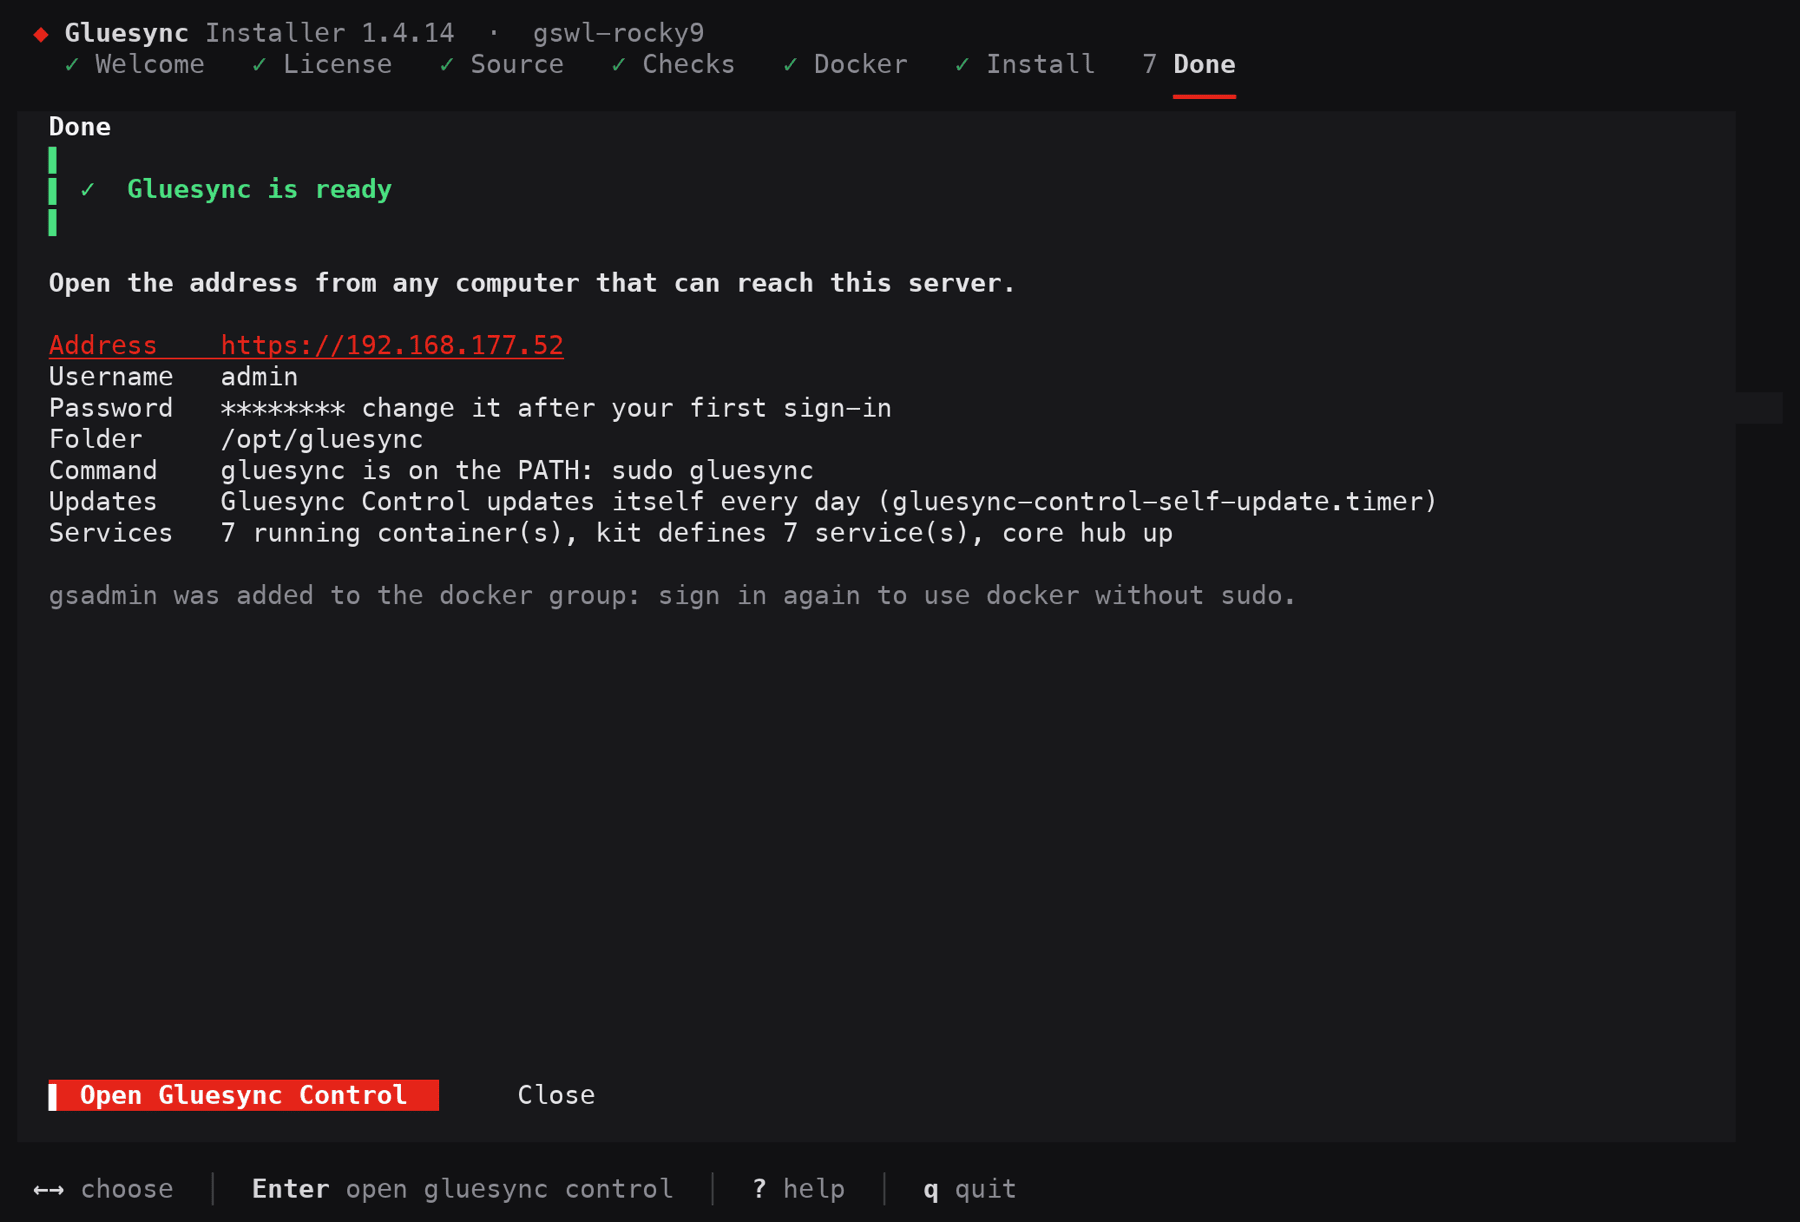
When it finishes you get the Control Plane address and gluesync on the PATH. Check with sudo gluesync status. Sign in from a browser at https://<server>, change the first admin password, and you are on the home page. For scripts, cloud-init or SSH without a TTY, pass the answers as GLUESYNC_* variables and nothing is asked.
One Linux-only gotcha before you start: the default Core Hub image wants an x86-64-v3 CPU (AVX2). Many hypervisors hide AVX2 from guests. Check with grep -o -w avx2 /proc/cpuinfo. If it is missing, the installer switches Core Hub to the -debian image variant for you. Pulling the default image by hand on that CPU fails hard.
Full walkthrough, supported distributions, ports, offline package and sizing notes: Install Gluesync on Linux and size the host. Kit overview: Install with the Gluesync kit.
After the install
Both paths leave you in the same place: a Control Plane you can open, seven services running, and Gluesync Control to start, stop, update and collect logs. Do not replace those commands with raw docker compose up or down. They skip the checks the kit tools run.
Then build a pipeline. The lean article stops here on purpose. The long guides keep the edge cases, the error codes and the offline paths. Use this page to pick a platform and get moving. Use those pages when something blinks amber.
Need a kit? Request a free trial. Prefer a walkthrough with someone who has done this before lunch more than once? Book a demo.
And if your install still wants forty minutes, it is usually the restart, the image pull or the antivirus chat. Rarely the Next button.